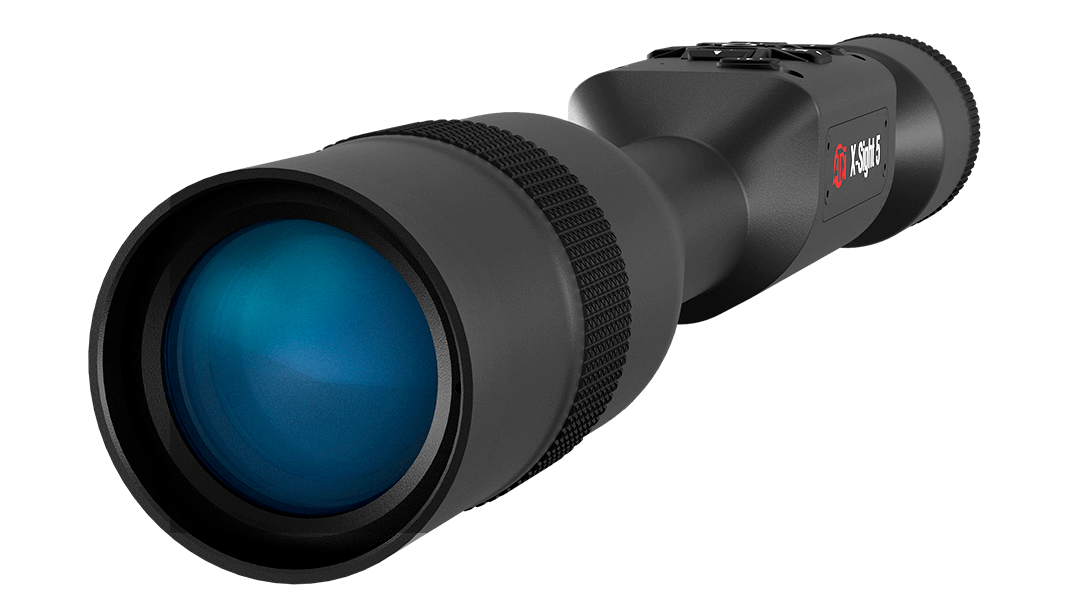
Introduction to Sighting In

Sighting in a scope is a crucial step in ensuring accuracy and precision when using a firearm. It involves adjusting the scope’s internal components to align the point of impact with the point of aim. This fundamental process is essential for achieving consistent hits on target, regardless of distance or environmental factors.
Proper sighting in directly impacts the effectiveness of the shooter. Consistent accuracy allows for better control in various shooting scenarios, whether it’s hunting, sport shooting, or defensive applications. A properly sighted-in scope allows the shooter to anticipate the trajectory of the projectile and place the shot with confidence.
Purpose of Sighting In
Sighting in a scope ensures that the projectile’s impact point aligns with the scope’s reticle (sight picture). This allows for precise shots at various distances. Accurate zeroing is vital for consistent performance and reliable results.
Importance of Proper Sighting
Proper sighting in a scope is paramount for achieving consistent accuracy and precision in shooting. A properly sighted-in scope enables a shooter to compensate for factors such as bullet drop, wind drift, and other variables, enhancing overall performance. Without proper zeroing, the shooter will experience inconsistent hits, impacting the effectiveness of the firearm.
Zeroing and Scope Adjustments
Zeroing is the process of adjusting the scope to make the point of impact (POI) coincide with the point of aim (POA). Scope adjustments are the mechanisms used to achieve this alignment. Different scopes use different adjustment dials, often with specific markings for precise incremental changes. Understanding the relationship between scope adjustments and zeroing is critical for achieving the desired results. Adjustments may be made in either vertical or horizontal planes.
Essential Tools and Equipment
Accurate sighting in requires specific tools and equipment. The following table Artikels the essential items:
| Tool | Description |
|---|---|
| Rifle/Gun | The target platform. |
| Scope | The optical sighting device. |
| Targets | Various types, distances, and materials. Different target types provide varying levels of feedback. For example, paper targets are commonly used for initial zeroing, while steel targets are more suitable for assessing the impact point at longer distances. |
| Cleaning Kit | Essential for maintaining the rifle/gun. |
| Measuring Tools (optional) | For precise measurements, such as rangefinders. These tools are beneficial for accurately determining distances to targets. |
Choosing the Right Target Range

Selecting the appropriate target range is crucial for accurate scope sighting. A well-chosen range ensures consistent results and allows for efficient adjustments to the scope’s zeroing. This section details various target ranges, their advantages and disadvantages, and their suitability for different applications.
Target Range Suitability Considerations
Effective scope sighting hinges on selecting a target range that provides an optimal balance between precision and practicality. Different target ranges offer varying degrees of challenge and opportunity for fine-tuning. The chosen range should directly correlate with the intended application of the firearm.
Different Target Ranges and Their Advantages/Disadvantages
- Short Ranges (10-50 yards): These ranges are ideal for initial zeroing and fine-tuning minor adjustments. Advantages include quick feedback, ease of target acquisition, and reduced environmental influences. Disadvantages include less opportunity for testing long-range performance, potential for inaccurate representation of true performance at longer distances, and less room for windage and elevation compensation. Appropriate for basic zeroing and initial scope adjustments, especially for beginners.
- Medium Ranges (50-100 yards): This range provides a better understanding of the scope’s performance in a wider range of conditions. Advantages include a better simulation of wind and other environmental factors, allowing for initial testing of long-range performance. Disadvantages include the increasing difficulty in maintaining consistent accuracy due to wind, and the potential for inaccuracies due to changing conditions. Appropriate for further zeroing and testing under controlled conditions.
- Long Ranges (100+ yards): These ranges are essential for determining the scope’s accuracy at extended distances. Advantages include a realistic simulation of actual shooting conditions and precise testing of windage and elevation compensation. Disadvantages include increased complexity due to environmental factors like wind and temperature, increased difficulty in target acquisition, and the potential for greater variation in results. Appropriate for determining the scope’s effectiveness at longer distances and for highly precise applications.
Target Size and Range Relationship
Target size is directly proportional to the distance at which it can be effectively identified. At shorter ranges, smaller targets can be used, while larger targets are needed at longer distances to ensure easy identification. A larger target at a longer range reduces the impact of minor aiming errors. For example, a small, tightly grouped target at 100 yards will likely require more precise adjustments than a larger target at the same distance.
Target Type Suitability Table, How to sight in a scope
| Target Type | Range Suitability | Description |
|---|---|---|
| Paper Targets | Short-medium | Affordable, easy to mark, ideal for initial practice. |
| Steel Targets | Medium-Long | Durable, consistent targets, suitable for more challenging ranges. |
| Electronic Targets | Short-Medium-Long | Interactive and measurable feedback, ideal for practice and refinement. |
Preparing the Shooting Position: How To Sight In A Scope
A stable and consistent shooting position is paramount for accurate scope sighting. This involves more than just holding the firearm; it’s about aligning your entire body for optimal control and repeatability. Proper positioning minimizes movement and allows for precise trigger control, leading to consistent shot placement.
Proper body alignment and a solid stance form the foundation of a reliable shooting position. Understanding the mechanics of your stance, along with the placement of your feet, significantly impacts your ability to deliver consistent shots. Practicing these techniques is crucial for long-term success in sighting in your scope.
Essential Elements of a Stable Shooting Position
A rock-solid shooting position hinges on several key elements. These factors, when combined, provide the stability and control necessary for precise shots. Maintaining these elements reduces unwanted movement and increases accuracy.
- Foot Placement: Your feet should be shoulder-width apart, or slightly wider, depending on your comfort and the specific firearm. This creates a stable base, preventing unwanted movement during the shot. Consider the terrain and ensure your feet are firmly planted to avoid shifting during the shot.
- Body Alignment: Proper body alignment involves maintaining a neutral spine and ensuring your weight is evenly distributed. A slight bend in the knees is often recommended, ensuring that your body weight is balanced and allowing for a smoother follow-through. This posture provides both stability and flexibility.
- Grip: A firm and controlled grip is crucial. It allows for the transfer of energy and minimizes the chance of jerking the firearm. Ensuring the grip is comfortable and firm helps control the firearm during the shot.
- Sight Alignment: Your eyes should be aligned with the sights of the firearm. This helps ensure your sights are in proper alignment with the target, which is critical for accuracy.
Maintaining a Consistent Shooting Position
Consistency is key to achieving accurate shots. Repeating the same process, using the same body positioning, and holding the firearm in a consistent way, will lead to consistent results.
- Practice: Consistent practice is essential for refining your shooting position. Regular practice helps you identify and correct any inconsistencies, leading to a more stable and repeatable stance.
- Adjustments: Adapt your position to the specific firearm and the range. A shooting position that works well for one firearm or distance may need slight adjustments for another. Trial and error, along with feedback from experienced shooters, can help identify and correct any needed adjustments.
- Consistency in Setup: Establish a consistent routine before each shot. This helps ensure that your body is positioned in the same way every time, minimizing variability in your shots.
Different Shooting Positions
Different shooting positions can be tailored to various situations and ranges. The choice of position depends on factors like the distance to the target, the terrain, and personal preference.
- Standing Position: Ideal for most sighting-in procedures, this position offers a stable base. Ensure a consistent stance and grip for reliable results.
- Kneeling Position: Useful for longer ranges or uneven terrain. This position provides greater stability and allows for a more focused sight picture. Proper support for your knees and elbows is important to maintain a stable posture.
- Prone Position: Best suited for extended ranges and precise shooting. This position provides maximum stability, but requires careful setup to avoid discomfort or strain.
Common Mistakes to Avoid
These mistakes can lead to inconsistent shots and inaccurate sighting.
- Shifting Weight: Unintentional shifting of your weight during the shot can affect your aim. Ensuring your weight is evenly distributed and your stance is stable will reduce this issue.
- Poor Grip: A loose or inconsistent grip can cause the firearm to move, resulting in inaccurate shots. A firm and consistent grip is crucial for control.
- Improper Sight Alignment: Ensure your eyes are properly aligned with the sights. If your sights are not aligned with the target, the shot will be inaccurate. This includes using proper eye placement and ensuring the sights are clearly visible.
- Lack of Consistency: Failing to maintain a consistent shooting position from shot to shot can lead to a wide dispersion of shots. Consistent repetition and practice are key.
Initial Zeroing Procedure

Properly zeroing your scope is crucial for accurate shots at various ranges. This initial zeroing process establishes a baseline for your scope’s adjustments, ensuring consistent point of impact (POI) across different distances. Understanding the zeroing procedure and the factors influencing it will lead to more reliable and effective shooting.
A well-executed zeroing process is the cornerstone of accurate long-range shooting. This procedure involves a series of steps, from selecting the appropriate target range to making consistent shots and adjusting the scope’s elevation and windage. Consistent shots are key to a precise zero, as slight variations can affect the final adjustment values.
Zeroing Methods
Different zeroing methods exist, each with its own advantages and disadvantages. The most common methods include zeroing at a specific range, such as 25 yards, 50 yards, or 100 yards. Each method produces a different point of impact, and the most appropriate method is based on the intended use and available range.
Step-by-Step Zeroing Procedure
This detailed procedure Artikels the key steps to zero a scope effectively.
- Select the Target Range: Choose a suitable range, typically 25, 50, or 100 yards, depending on your shooting needs and the scope’s capabilities. A longer range allows for a more thorough zero, but a shorter range allows for more frequent practice sessions.
- Prepare the Shooting Position: Ensure your shooting position is stable and repeatable. This ensures consistent shot placement, minimizing positional errors.
- Zeroing Shots: Take several shots, at least three, and carefully note the points of impact. This establishes a baseline for the scope’s initial zeroing.
- Elevation Adjustment: Carefully adjust the elevation turret to bring the point of impact closer to the point of aim. This is done in small increments, and each adjustment should be followed by a test shot to determine the effect on the POI. Observe the position of the bullet holes on the target after each adjustment.
- Windage Adjustment: Adjust the windage turret to align the point of impact with the point of aim. This adjustment is critical for compensating for any bullet drift caused by wind or other external factors. Similarly, make small adjustments and confirm the effect on the POI with test shots.
- Verification and Repeat: After making elevation and windage adjustments, take a series of shots and carefully note the point of impact. If the POI is still not aligned with the point of aim, repeat the process from step four. A well-executed zeroing procedure often involves multiple rounds of adjustment and verification.
Importance of Consistent Shots
Consistent shots are essential for an accurate zero. Variability in shot placement can lead to inaccurate adjustments and a final zero that is unreliable. Factors such as trigger pull consistency, hold, and breathing technique all contribute to achieving consistent shots.
Elevation and Windage Adjustments
Elevation adjustments compensate for vertical discrepancies between the point of aim and the point of impact. Windage adjustments compensate for horizontal discrepancies, such as bullet drift due to wind. These adjustments are crucial for achieving an accurate zero and consistently hitting the intended target at various ranges. A well-calibrated scope with appropriate adjustments allows the shooter to compensate for external factors, like wind and distance, for accurate hits. It is essential to make small, incremental adjustments and verify the effect of each change.
Fine Tuning and Adjustments

Once you’ve established your initial zero, the process of fine-tuning becomes crucial for achieving consistent accuracy. This stage refines the scope’s settings to compensate for minute variations and ensure consistent performance across different shooting conditions. Precise adjustments are vital for delivering reliable results in all situations.
Methods for Fine-Tuning
Fine-tuning involves making incremental adjustments to the scope’s elevation and windage settings to optimize the point of impact (POI) for your specific firearm and ammunition combination. This often requires patience and meticulous attention to detail.
Importance of Repeatability and Consistency
Achieving repeatability in your adjustments is paramount. Each subsequent shot should demonstrate consistent POI alignment with the target. This consistency ensures the accuracy of your firearm and your ability to predict the impact point reliably. For instance, if you consistently adjust the scope by 1/4 MOA increments, you can predict the effect of each adjustment on the POI.
Adjusting Elevation and Windage
Adjusting elevation and windage requires understanding how these settings affect the projectile’s trajectory. Elevation adjustments alter the vertical position of the POI, while windage adjustments modify the horizontal position. Using a known target and a consistent shooting method is key to understanding the scope’s response to these adjustments.
- Elevation Adjustments: These adjustments move the POI up or down on the target. A positive elevation adjustment moves the POI upward, while a negative adjustment moves it downward. Accurate adjustment is essential for hitting targets at varying distances.
- Windage Adjustments: Windage adjustments alter the horizontal position of the POI. A positive windage adjustment moves the POI to the right, while a negative adjustment moves it to the left. These adjustments are vital for compensating for crosswinds.
Recording Adjustments
Keeping meticulous records of all adjustments is crucial for future reference. A logbook detailing elevation and windage changes, along with the conditions (e.g., wind speed, temperature), will allow you to quickly recreate the settings for similar shooting conditions. This allows for efficiency and consistency. A simple spreadsheet or even a notebook can suffice. For example, a note indicating “Elevation + 1/4 MOA, Windage – 1/8 MOA, Temp 70°F, Wind 10 mph, Humidity 60%” provides valuable context for future sessions.
Influence of Environmental Factors
Environmental conditions, such as temperature, humidity, and wind, can affect the projectile’s trajectory. Higher temperatures can cause the bullet to rise slightly, while stronger winds can deflect it horizontally. Adjustments made in one set of conditions might need further refinement in different conditions. For instance, a slight upward adjustment in hot weather might be needed to compensate for the bullet’s higher trajectory.
Maintaining the Scope
Proper scope maintenance is crucial for preserving its functionality and accuracy. A well-maintained scope ensures consistent performance, prolongs its lifespan, and minimizes the risk of malfunctions during critical shooting situations. Neglecting proper care can lead to costly repairs and compromised performance.
Maintaining your scope involves a combination of regular cleaning, lubrication, inspections, and protective measures. These steps ensure the scope’s precision and reliability, guaranteeing accurate shots in various shooting conditions.
Cleaning Procedures
Regular cleaning is essential to remove dirt, dust, and debris that can accumulate on the scope’s lenses and internal components. This prevents light distortion, impacting the clarity of the target image and accuracy. Failure to clean regularly can lead to optical aberrations, requiring more extensive and costly repairs.
- Disassemble the scope according to the manufacturer’s instructions. This will allow for a thorough cleaning of all components.
- Use compressed air or a soft brush to remove loose dirt and debris from the exterior and internal components.
- Use a lens cleaning solution and a microfiber cloth to clean the lenses. Avoid using paper towels or other abrasive materials, as they can scratch the lens surface.
- Pay particular attention to the scope’s internal components, such as the objective and eyepiece lenses, which are critical for optimal image clarity.
Lubrication
Lubrication of moving parts within the scope is crucial for smooth operation and prevents wear and tear. Proper lubrication ensures the smooth movement of internal mechanisms, which directly impacts the scope’s performance. Improper lubrication can lead to increased friction and reduced functionality.
- Apply a suitable scope lubricant to the moving parts, following the manufacturer’s recommendations.
- Avoid over-lubrication, as excessive lubricant can attract dust and debris, potentially causing more harm than good.
- Use only lubricants designed for optical equipment to prevent damage to the scope’s internal mechanisms.
Inspection for Damage
Regular inspection helps detect potential damage or wear and tear early on. This proactive approach allows for timely repairs, preventing further deterioration and maintaining the scope’s accuracy. Ignoring signs of damage can lead to costly repairs or, worse, compromise the safety of the user.
- Visually inspect the scope for any scratches, cracks, or dents on the exterior and internal components.
- Check the lenses for any clouding or distortions that could affect the image clarity.
- Examine the scope’s mounts and rings for any signs of looseness or damage that could compromise the scope’s stability.
- Ensure all screws and fasteners are tight and secure to prevent accidental detachment or movement.
Protective Measures
Protecting the scope from damage is vital to maintain its performance. Taking preventative measures can significantly extend the lifespan of the scope and avoid costly repairs. Damage to the scope can lead to decreased accuracy and may affect shooting safety.
- Store the scope in a protective case or hard-shell container to prevent damage from impacts and scratches.
- Transport the scope securely to avoid accidental drops or impacts during transit.
- Use appropriate scope rings and mounts to ensure the scope is securely attached to the firearm.
- Avoid exposing the scope to extreme temperatures, as this can cause damage to the lenses and internal components.
Storage
Proper storage is essential to maintaining the scope’s condition and longevity. Storing the scope in a suitable environment and protecting it from damage will prolong its use and effectiveness. Improper storage can lead to premature degradation of the scope’s components.
- Store the scope in a clean, dry, and temperature-controlled environment to prevent moisture damage and condensation.
- Store the scope in a vertical position to prevent pressure from accumulating on the lenses and internal mechanisms.
- Ensure the scope is stored in a location that is free from excessive dust, debris, and extreme temperature fluctuations.
Troubleshooting Common Issues

Troubleshooting scope sighting issues is crucial for ensuring accurate and consistent shots. Understanding the potential problems and their causes allows for efficient diagnosis and resolution, preventing frustrating setbacks and wasted time. Careful examination and systematic checks are essential to identify the source of the problem, whether it lies with the shooter, the rifle, or the scope itself.
Identifying Scope Malfunctions
Scope malfunctions can stem from various factors, including improper installation, damage, or inherent flaws. Careful inspection is paramount to determining the root cause. A loose or damaged scope mount can lead to inaccurate readings, as can a damaged lens or faulty internal components.
- Loose Scope Mount: A loose scope mount is a common problem that can affect zeroing. The mount might have shifted during transport or use, leading to a misaligned scope. Visually inspect the mount for tightness, ensuring all screws are securely fastened. If necessary, re-tighten the screws, and if the problem persists, consider replacing the scope mount.
- Damaged Lenses: Scratches, chips, or other imperfections on the scope’s lenses can affect light transmission and image clarity, ultimately impacting accuracy. Examine the lenses for any visible damage. If damage is found, consider professional repair or replacement. A damaged lens is usually evident from a distorted or blurry image.
- Internal Component Issues: Internal components, such as the elevation and windage adjustment mechanisms, can malfunction. This can manifest as erratic or unresponsive adjustments, or a complete lack of response. If you suspect an internal component problem, consult a qualified gunsmith. They can accurately assess the issue and provide appropriate repair or replacement solutions.
Determining the Source of the Problem
Determining whether the problem lies with the scope, rifle, or the shooter is essential for effective troubleshooting. A systematic approach helps isolate the source quickly.
- Scope Inspection: Check for visible damage, loose components, or signs of internal malfunction. Verify the scope’s mounting and ensure it’s properly secured to the rifle.
- Rifle Assessment: Ensure the rifle’s action and barrel are functioning correctly. Check for any loose parts, damage, or inconsistencies in the trigger pull. If the rifle has a different sighting system, this should also be checked.
- Shooter Evaluation: Analyze the shooter’s shooting technique, stance, and hold. Ensure consistent and proper grip, aiming, and breathing techniques are being followed. If the shooter is new to using a scope, adequate training and practice are essential to achieve accurate results.
Example Troubleshooting Scenarios
Troubleshooting scope sighting problems can vary, depending on the exact issue.
- Scenario 1: The scope consistently reads higher than the actual shot impact. This might indicate a problem with the scope’s elevation adjustment mechanism. Verify if the elevation turret is functioning correctly and re-tighten the mount.
- Scenario 2: The scope produces a blurry image. This could be caused by scratched or dirty lenses. Clean the lenses with appropriate lens cleaning solutions and inspect for any visible damage.
- Scenario 3: The scope’s adjustments are unresponsive. This indicates a potential internal component problem. Consult a qualified gunsmith to assess the scope’s internal mechanisms and make necessary repairs.
Top FAQs
How to sight in a scope – What are the most common mistakes when setting up a shooting position?
Common mistakes include an unstable stance, improper body alignment, and inconsistent hold. Ensure your feet are shoulder-width apart, your body is centered over the target, and your hold is firm but relaxed.
How often should I clean and lubricate my scope?
Regular cleaning and lubrication, typically after each shooting session, are crucial to maintain optimal performance and prevent damage. Refer to your scope’s manufacturer guidelines for specific recommendations.
What are some environmental factors that can affect scope adjustments?
Temperature fluctuations, wind, and humidity can affect scope adjustments. Always consider these factors and make necessary adjustments to compensate for their influence.